Standing Head to Knee Pose — Dandayamana Janushirasana in Sanskrit — is posture 5 in the Bikram yoga standing series and the most technically demanding single-leg balance posture in the sequence. It is structured as a four-stage progression, and it is the posture in which the gap between beginner and advanced practitioner is most clearly visible in the room.
Most practitioners spend months — sometimes years — working through the four stages. This is not a failure of progress. It is the posture working correctly. The four stages exist because each one develops a specific physical quality that the next stage requires. Understanding the logic of the progression is what makes consistent improvement possible.
Standing Head to Knee Pose (Dandayamana Janushirasana) is a four-stage progressive single-leg balance posture — posture 5 in the Bikram standing series. Stage 1: standing knee locked, foot gripped. Stage 2: leg extended, standing knee locked. Stage 3: elbows below the calf, forehead approaching the knee. Stage 4: forehead touching the knee, chin beyond the knee. Hold time: 10 seconds per side, 2 sets. The standing knee must be locked before the lifted leg is extended — in every stage.
Why Standing Head to Knee Is Structured as Four Stages
The four-stage progression of Dandayamana Janushirasana is one of the clearest examples of the Bikram sequence's internal logic. Each stage is not simply a harder version of the previous one — it is a qualitatively different physical demand that builds on what the previous stage developed.
Stage 1 develops the standing knee lock and the grip strength to hold the foot extended. Stage 2 develops the hamstring flexibility of the lifted leg alongside the balance demand of the extended leg. Stage 3 develops the spinal forward flexion and abdominal engagement that brings the upper body toward the extended leg. Stage 4 produces the full compression — forehead to knee, chin beyond knee — that delivers the posture's complete physiological effect.
Attempting Stage 3 or 4 without the foundation of Stages 1 and 2 — skipping the knee lock, rushing the leg extension — produces a posture-shaped movement with none of the therapeutic benefit. The stages are not decorative. They are the posture.
The Four Stages: Detailed Breakdown
Stage 1: Standing Knee Locked, Foot Gripped
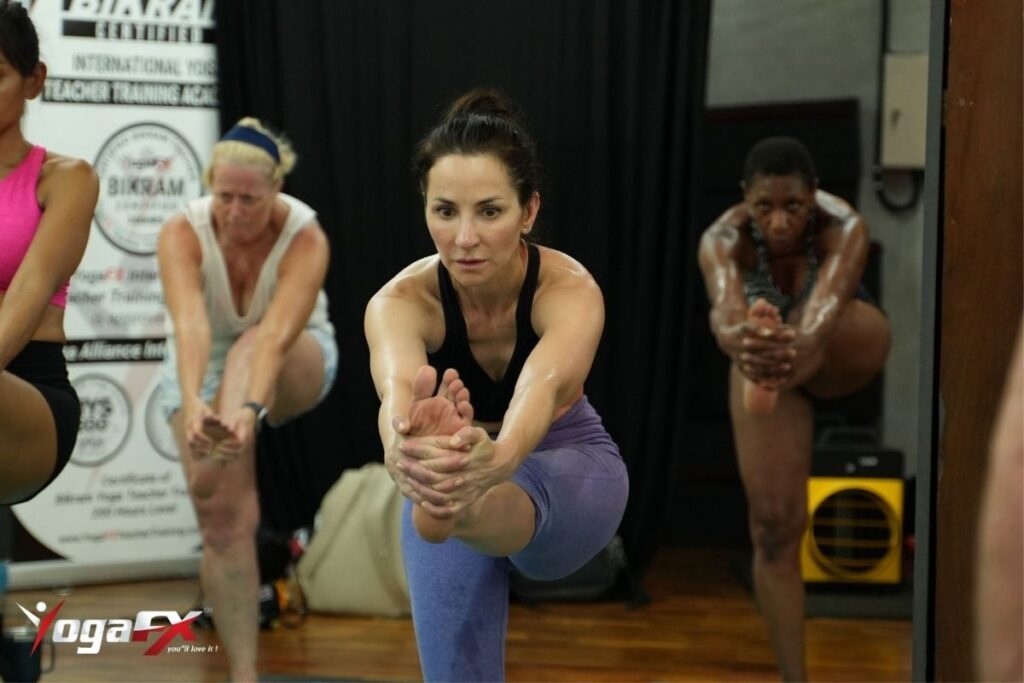
Stand on the right leg. Bend the left knee and interlace both hands beneath the left foot — fingers interlaced underneath the arch, thumbs on top. Stand upright with the left knee bent and the left foot held at waist height. Then: lock the right (standing) knee. Hyperextend it if possible. The standing knee must be visibly locked — not soft, not slightly bent. Locked.
This is the foundation of every subsequent stage. If the standing knee is not locked in Stage 1, everything built on it — the leg extension of Stage 2, the forward bend of Stage 3, the head-to-knee of Stage 4 — will be unstable or anatomically inaccessible. Hold Stage 1 for the full 10 seconds if Stages 2–4 are not yet accessible. A correctly executed Stage 1 is a complete expression of the posture at that level. It is not a warm-up for Stage 2.
Stage 2: Leg Extended, Standing Knee Locked
From Stage 1 with the standing knee locked: straighten the lifted left leg. Push the left heel away from the body, extending the leg as fully as possible. The left toes are flexed toward the face. Both elbows remain bent, arms pulling the foot gently toward the body while the heel pushes away — this creates a productive tension that deepens the hamstring stretch.
The standing knee must remain locked as the leg extends. This is the critical technical instruction of Stage 2. Most practitioners unlock the standing knee as they extend the lifted leg — the body compensates for insufficient hamstring flexibility by bending the support leg. This compensation eliminates the balance challenge and reduces the hamstring stretch simultaneously.
If the standing knee unlocks when the lifted leg extends, return to Stage 1. Stage 2 requires both a locked standing knee and an extended lifted leg — neither alone constitutes Stage 2.
Stage 3: Elbows Below the Calf, Rounding Forward
From Stage 2 with both the standing knee locked and the lifted leg extended: bend the elbows downward so that both elbows are below the calf of the extended leg. This elbow movement initiates a forward rounding of the upper body toward the extended leg. The forehead begins to approach the knee from above.
The abdominal engagement required to hold the torso in the forward-flexed position while maintaining the standing knee lock and leg extension is significant. Stage 3 is where the posture transitions from primarily a balance and hamstring challenge to a combined abdominal, balance, hamstring, and spinal flexion challenge.
The correct cue for Stage 3: pull the elbows down toward the floor, not the foot toward the face. The downward elbow movement initiates the forward body position; attempting to pull the foot toward the face without the elbows moving down produces a shoulder-flexion movement rather than the intended spinal forward bend.
Stage 4: Forehead to Knee, Chin Beyond the Knee
From Stage 3 with elbows below the calf and the body rounding forward: bring the forehead to touch the knee of the extended leg, then continue until the chin passes beyond the knee. Both elbows are below the calf. The standing knee remains locked. The lifted leg remains fully extended. The forehead is in contact with the knee — not hovering above it.
Stage 4 is the full expression of Dandayamana Janushirasana. Very few practitioners in a general Bikram class are consistently in Stage 4 on both sides. This is normal. The posture's benefits are available at every stage — Stage 4 is not a requirement for progress or for receiving the therapeutic value of the posture.
Stage-by-Stage Reference
| Element | Stage 1 | Stage 2 | Stage 3 | Stage 4 |
|---|---|---|---|---|
| Standing knee | Locked | Locked | Locked | Locked |
| Lifted leg | Bent, foot gripped | Fully extended | Fully extended | Fully extended |
| Elbows | Bent, above foot | Bent, above foot | Below the calf | Below the calf |
| Upper body | Upright | Upright | Rounding forward | Forehead to knee |
| Primary demand | Balance + knee lock | Hamstring + balance | Abdominal + spinal flexion | Full expression |
Primary Benefits of Standing Head to Knee Pose
1. Concentration and Mental Discipline
Holding a locked standing knee, an extended lifted leg, and a forward-flexed torso for 10 seconds in a 40°C room while the cardiovascular system is elevated requires a level of sustained mental focus that is unique in the standing series. The Bikram dialogue describes Standing Head to Knee as primarily a concentration exercise. Practitioners who develop their Standing Head to Knee consistently report improvements in sustained focus and the ability to hold attention under physical stress — qualities that transfer beyond the yoga studio to work and daily demands.
2. Hamstring Flexibility and Sciatic Nerve Stretch
The extended lifted leg in Stages 2–4 creates a sustained hamstring stretch under load — one of the most effective in the standing series because the stretch is held with the opposing force of the hands gripping the foot. The sciatic nerve, which runs through the hamstring region, is gently lengthened in Stages 2–4 when the leg is fully extended with toes flexed. Practitioners with mild sciatic symptoms frequently report gradual relief through consistent Standing Head to Knee practice.
3. Standing Leg Strength — Quadriceps and Hip Stabilisers
The locked standing knee is not a passive position — it requires active quadriceps engagement (particularly the vastus medialis) and continuous hip stabiliser recruitment to maintain through 10 seconds under the challenge of the lifted and extended opposite leg. This sustained isometric demand on the standing leg's quadriceps and hip abductors is one of the primary strength benefits of the posture and directly relevant to the quad strength developed in Awkward Pose earlier in the series.
4. Abdominal Strengthening (Stages 3–4)
Holding the torso in the forward-flexed position of Stages 3 and 4 while maintaining the standing knee lock requires sustained abdominal engagement — the rectus abdominis and transverse abdominis must work continuously to prevent the torso from dropping or the lower back from rounding excessively. This isometric abdominal demand is one of the most sustained in the standing series.
5. Pituitary Gland Stimulation (Stage 4)
In Stage 4, the forehead compression against the knee is attributed in traditional Bikram instruction to stimulation of the pituitary gland — the master endocrine gland at the base of the brain. This attribution follows the traditional Hatha yoga physiology framework and is presented as attributed teaching context rather than confirmed in peer-reviewed research specific to this posture.
The Standing Head to Knee Pose Lock: The Single Most Important Technical Instruction
The locked standing knee appears in every stage of Standing Head to Knee, every set, every class. It is not optional and it is not a beginner requirement that advanced practitioners outgrow. The posture is defined by it.
What a locked knee means specifically: the quadriceps are engaged fully, the knee is hyperextended as far as the joint allows, and the leg is completely straight — no soft bend, no slight yield. From the side, the locked standing knee produces a visible hyperextension arc. The standing leg looks longer and straighter than a merely straight leg.
Why the locked knee is non-negotiable: the locked standing knee is the mechanical foundation of everything the posture builds on. A soft standing knee produces sway under load, reduces the hamstring stretch of the lifted leg by allowing the hips to shift, and makes Stages 3 and 4 anatomically inaccessible because the forward flexion of the torso requires the stability that only a locked standing knee provides.
Common Mistakes and How to Fix Them
Mistake 1: Standing Knee Unlocking as Lifted Leg Extends
The most universal error in Standing Head to Knee and the one with the most significant impact on every subsequent stage. The standing knee unlocks because the hamstrings of the lifted leg are not yet flexible enough to allow full extension without the body compensating through the standing leg. The compensation feels like progress — the lifted leg extends — but the posture has lost its foundation.
Fix: If the Standing Head to Knee Pose unlocks as the lifted leg extends, return to Stage 1. Work Stage 1 consistently until the standing knee lock is automatic and stable. Stage 2 will become accessible as hamstring flexibility develops independently through consistent practice.
Mistake 2: Rushing from Stage 1 to Stage 3 or 4
Practitioners who have seen Stage 4 in the mirror frequently attempt to skip Stage 2 and go directly to a rough approximation of Stage 3 — body bent forward, leg partially extended, Standing Head to Knee Pose soft. This produces none of the benefits of any stage and risks hamstring and lower back strain.
Fix: Work the stages in strict sequence. Stage 2 requires the Standing Head to Knee Pose locked and the lifted leg fully extended — hold this position precisely for 10 seconds before attempting to add the forward bend of Stage 3.
Mistake 3: Pulling the Foot Toward the Face Instead of Pushing the Heel Away
The hand-and-foot mechanics involve a specific tension: the hands pull the foot gently toward the body while the heel of the lifted leg pushes away. This opposing force is what creates the productive hamstring tension. Practitioners who only pull the foot — without the heel pushing — produce a passive hamstring position rather than the active lengthening that drives flexibility progress.
Fix: Consciously create both directions simultaneously. The hands pull; the heel pushes. The productive tension between these two forces is the mechanism of the hamstring stretch.
Mistake 4: Looking Down
Dropping the gaze downward during Standing Head to Knee Pose dramatically reduces balance stability. The visual system contributes significantly to proprioceptive balance — looking at the floor removes the fixed reference point the vestibular system uses to maintain position. Most balance failures in this posture are preceded by a dropped gaze.
Fix: Fix the gaze on a single point at eye level or slightly above. Do not look at the lifted foot, the floor, or the mirror image of the lifted leg. One fixed visual point on the wall in front of you.
Modifications by Level
Beginner: Stage 1 Only
Work Stage 1 exclusively until the Standing Head to Knee Pose lock is stable and the balance in the gripped-foot position is consistent across both sets and both sides. This may take several weeks or months. Stage 1 is a complete and correct expression of the posture at the beginner level — it is not a reduced version. Every alignment principle of the full posture is present in Stage 1.
Intermediate: Stage 2
Once Stage 1 is stable, work Stage 2 by extending the lifted leg while maintaining the Standing Head to Knee Pose lock. If the lock breaks as the leg extends, return to Stage 1. Work Stage 2 until both the standing knee lock and the full leg extension can be held simultaneously for 10 seconds. The elbows remain above the foot in Stage 2 — do not attempt to add the forward bend of Stage 3 until Stage 2 is stable.
Advanced: Stages 3 and 4
Add Stage 3 only when Stage 2 is consistently stable. The elbow drop below the calf initiates the forward bend — do not use the forward bend to compensate for insufficient leg extension. In Stage 4, the forehead actively presses against the knee rather than hovering above it. Advanced practitioners focus on even spinal flexion across all thoracic and lumbar vertebrae, not only rounding at the hips.
FAQ
How long does it take to get Standing Head to Knee in Bikram yoga?
Stage 2 — locked Standing Head to Knee Pose with fully extended lifted leg — is typically accessible within 3–6 months of consistent 3–4× weekly practice. Stage 3 may take 6–12 months. Stage 4 — forehead touching knee — may take 1–3 years or longer, and not all practitioners reach it. Progress depends on hamstring flexibility, balance development, and consistency of practice more than any other variables.
Why does my standing knee keep unlocking?
The Standing Head to Knee Pose unlocks because the hamstrings of the lifted leg resist extension and the body compensates by allowing the standing knee to soften. This is an automatic postural compensation, not a technique failure. The solution is not to try harder to lock the knee — it is to work Stage 1 consistently until the standing knee lock becomes an ingrained automatic position before attempting Stage 2.
What is the correct hand position in Standing Head to Knee?
Both hands interlaced beneath the arch of the lifted foot — fingers interlaced underneath, thumbs on top of the foot. The hands create the pulling direction while the heel of the lifted foot pushes in the opposing direction — this productive tension between pull and push generates the hamstring stretch of Stages 2 through 4.
Can beginners do Standing Head to Knee Pose?
Yes — at Stage 1. The Standing Head to Knee Pose locked with the lifted foot gripped and the knee bent is a complete beginner expression of the posture. The Bikram dialogue accommodates all four stages in a single class because every level of practitioner is working the same posture simultaneously — beginners in Stage 1, advanced practitioners in Stage 4. No separate modification is required.
What is the difference between Standing Head to Knee and Standing Bow in Bikram yoga?
Both are single-leg balance postures but with opposite orientations. Standing Head to Knee involves forward flexion — the lifted leg extends forward and the torso bends toward it. Standing Bow involves a simultaneous backbend and forward pitch — the lifted leg kicks back and upward while the torso pitches forward. Standing Head to Knee develops hamstring flexibility and sustained concentration. Standing Bow develops cardiovascular demand and the specific balance challenge of the kick-and-reach opposition.